|
|
Understanding Ease Charts
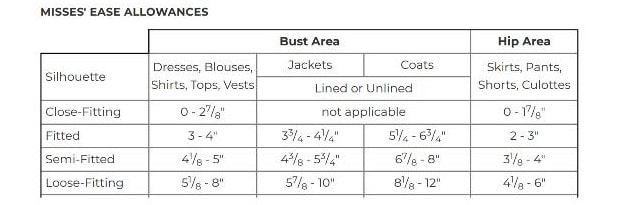
For the first line, we have close fitting. And they have measurements for the dresses and blouses column, and for the pants column. They don’t have measurements for the jackets and coats columns, because it would just be pretty rare to have a close fitting jacket or coat. They would just be REALLY tight.
The discrepancy I have with this chart is that you will never have zero ease. If you made a dress or blouse with zero ease, you wouldn’t be able to breath. There is a minimum amount of ease necessary at the bust line to allow for breathing. The standard measurement for that is two inches. Some people may need more or less. Best to take your own bust measurement standing relaxed, then take it again after taking a deep breath. And that would be the minimum of ease you would need at the bust line. And this is called wearing ease. But do keep in mind that even after adding the wearing ease to your bust measurement, this would make a slightly loose garment when you are relaxed, but a tight fitting garment when you are taking a deep breath, which could cause pulling and gaping with a button down garment. So if you are working with a button down garment, you wouldn’t want to use the ease guidelines for a close fitting garment.
And it’s the same for pants. If you made a pair of pants with no ease, you wouldn’t be able to sit down. There is a difference in your hip measurement between standing and sitting. The standard measurement for hip ease is two inches. But again, you can take your hip measurement standing up, then again sitting down. Add an extra inch for good measure, and that difference would be your minimum wearing ease for your hip line. For me, I need just a bit more than 2 inches cuz I have a fat butt.
So the rest of the lines, fitted, semi fitted and loose fitting, are pretty self explanatory. These are called design ease, and they are all about the look you are trying to achieve with your garment. Maybe a good way to think about it is like this. The first line, close fitting would be for a shirt. The second line, fitted would be for a vest. The next line, semi fitted would be for a frock coat. And the last line, loose fitting would be for an overcoat. So, for example, if you wanted a blouse to fit very loose like an overcoat, then you would add 5-8 inches of ease to your pattern, as it notes on the fourth line for a blouse. Now this is TOTAL ease. You don’t add in the wearing ease, and then add in the design ease. These measurements are for the total ease to add. Just remember that you do need a minimum amount, so you would never design a garment with zero ease.
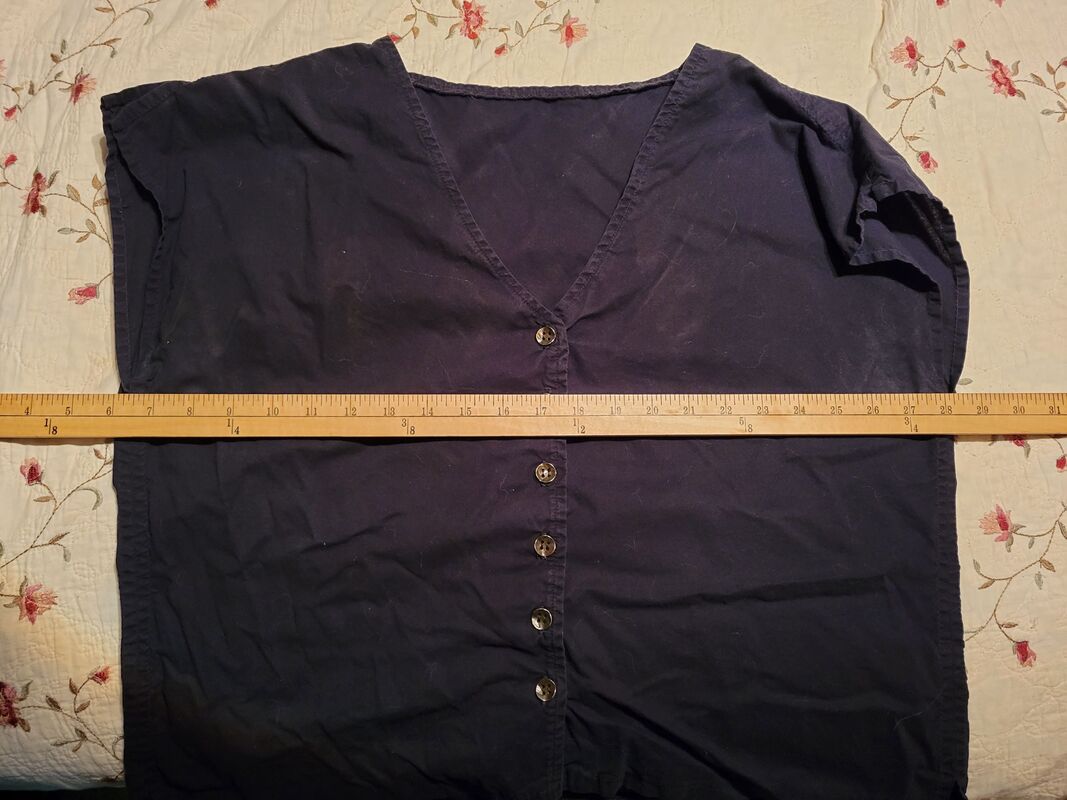
Another way to figure out how much ease you want in your new pattern, is to grab a garment that you own, and that fits the way you want your new garment to fit, and take measurements from that garment.

OK. So hopefully this makes sense. Please let me know if it doesn’t.
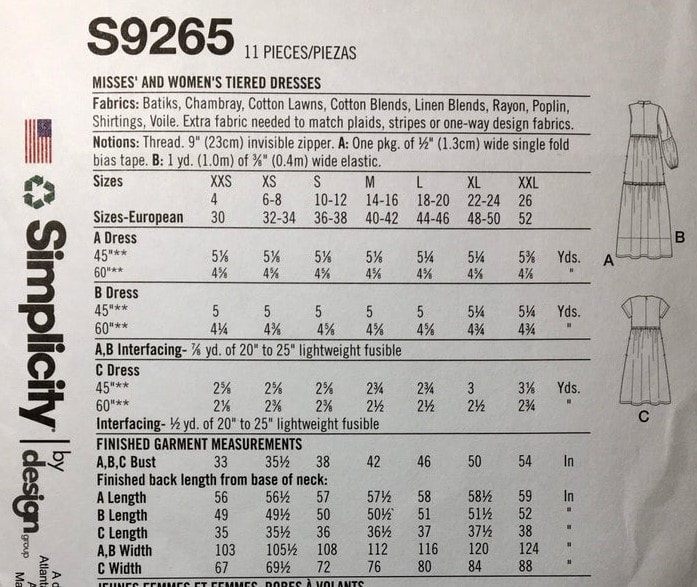
Standard Measurement Charts
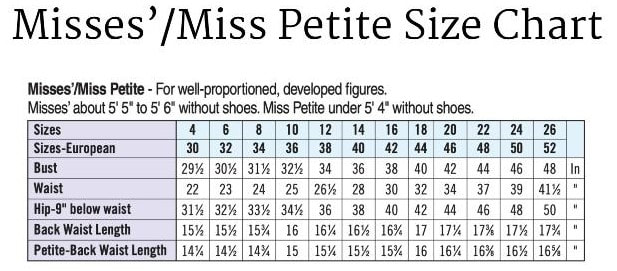
So I can see on this chart that I am a perfect size 22. Which is crazy because I wear a size 14 in clothes that I buy at the store. So first thing is to note there is a difference between pattern sizing and clothing sizing. I have heard of so many people who have bought and/or cut a certain pattern size just based on their clothing size, and not even looking at the measurements on the chart. So just make sure you are aware of that.
Now, I’m sure you can find your measurements on this chart too. Maybe it’s easy, like mine. Or maybe its a bit more difficult because you are in between sizes. Maybe your bust is in one size, and your waist is in another size. My advice would be to choose the size that corresponds with your bust measurement for tops and dresses, and your hip measurement for pants and skirts. It is ALOT easier to make adjustments to the waistline.
Now, if your measurements are not on this chart at all, either you are bigger or smaller. Don’t worry, there is a solution for you too!
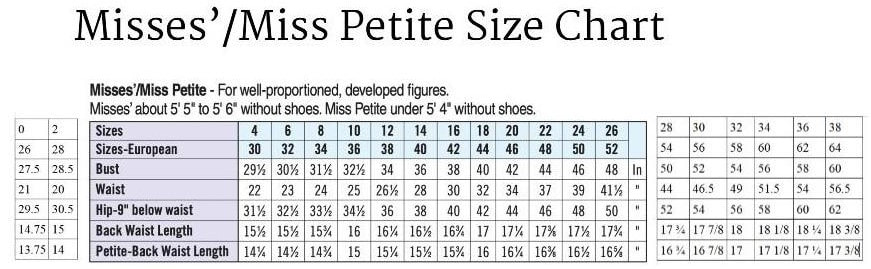
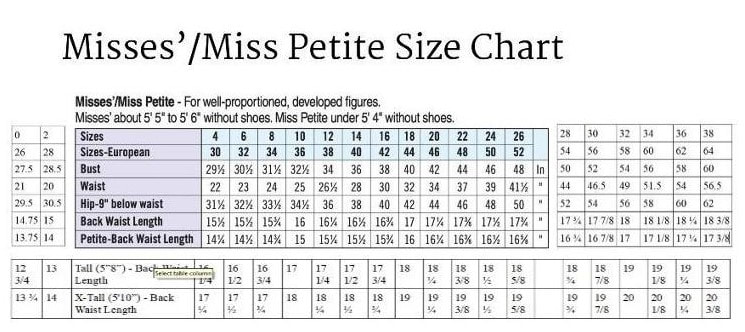
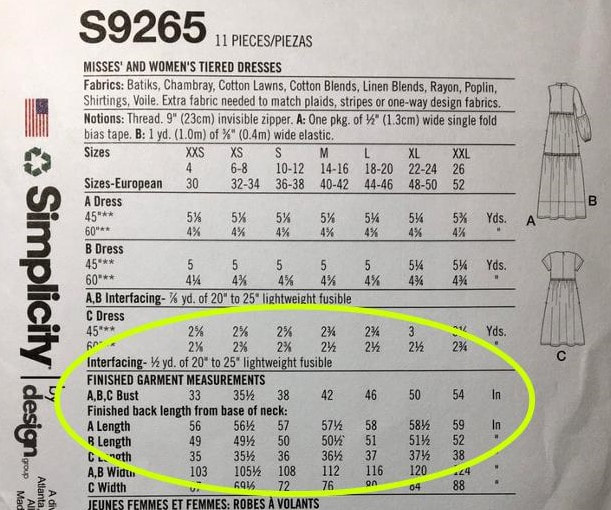
The other important measurement on this chart is the back to waist length measurement. As you can see, the difference in these measurements from one size to the next is negligible – 1/4 inch per size in the middle and lower sizes, or 1/8 inch per size in the larger sizes. But when you go up or down say 4 sizes, you’ve got a very big jump. And you can see the difference between the regular height measurements and the petite height measurements. It’s about an inch difference. And you could even add another line, or even two more lines onto the bottom of this chart for taller people.
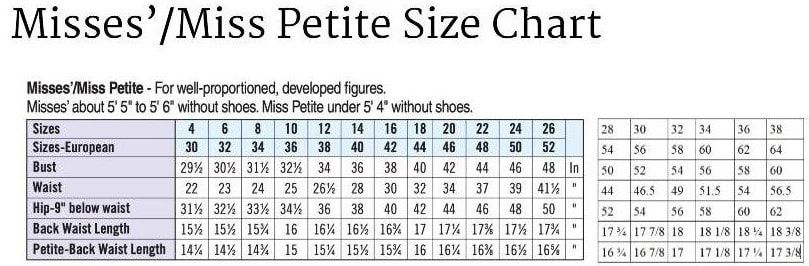
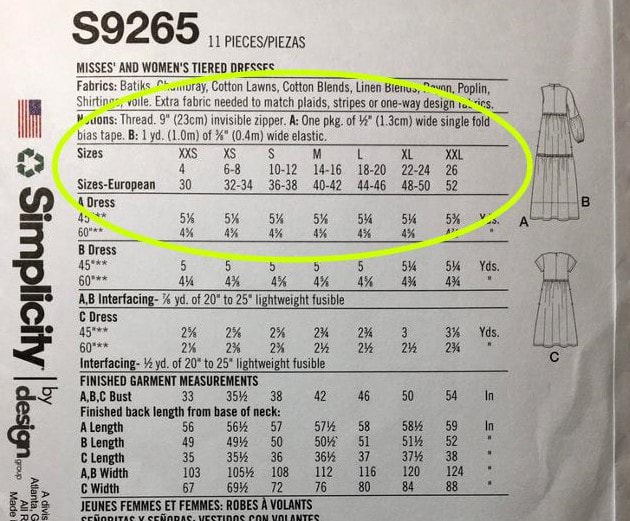
Pattern Size Charts
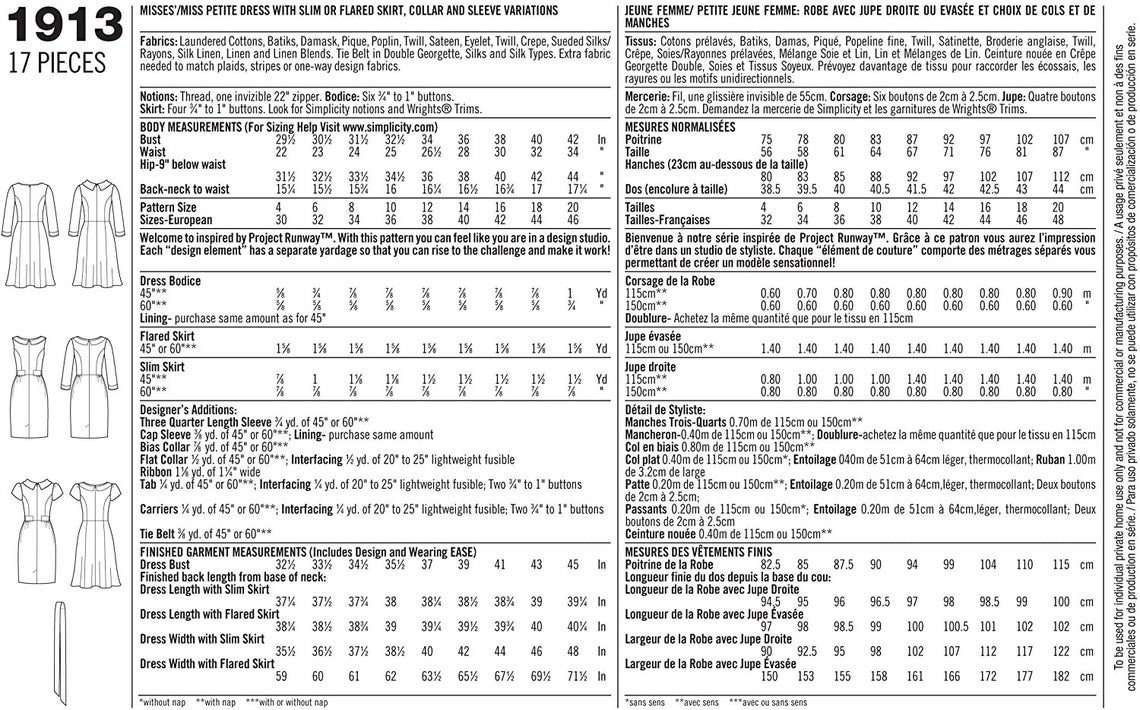
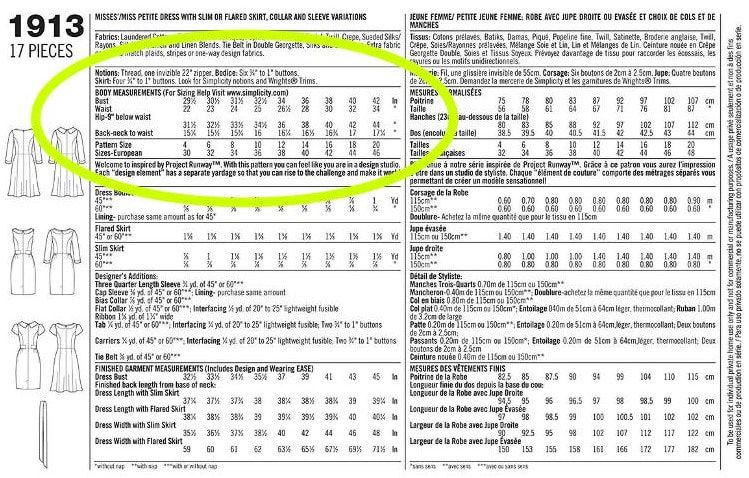
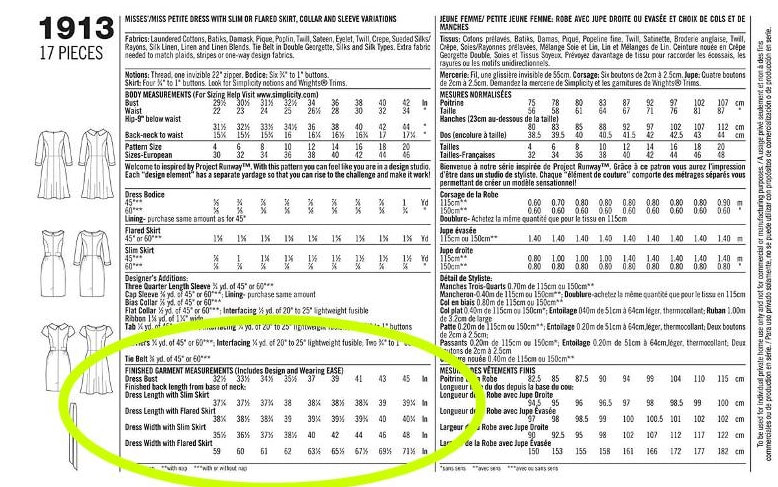
Then we look at the ease allowed for in the pattern. The ease for this pattern is three inches at the bust line. So if you want more or less ease, then you can adjust your measurements accordingly.
So now you know how to figure out how much pattern adjustment you need for resizing your patterns. I hope this makes sense. Again, if it doesn’t, please let me know.
I really hope this has been helpful to you. And thanks so much for joining me today. Take care and happy sewing!